by Dianne D. Glasscoe, RDH, BS
In the beginning ...
Do you remember when you got your new instrument sets in dental hygiene school? They were so beautiful! All of the edges were razor-sharp, and they glistened seductively from the instrument tray. They seemed to shout, "Choose me. I'm brand new and ready to work ..." However, over time as patients came and went, the "shouts" became fainter as the instruments became dull from use. Like a dying man begging for a drink of water, the admonition became, "Please, please, help me! Give me my edge back! I'm tired, I'm worn, I'm weary ..." (OK, so I'm being a little dramatic here, but you get the point (pun intended!).
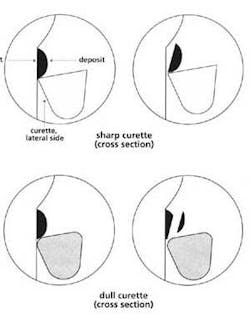
Curette in cross-section
When we were in hygiene school, we received instructions in proper sharpening technique. Hu-Friedy Dental (www.hu-friedy.com), one of the leading manufacturers of fine dental instruments, provides a video and a handbook that teaches the basics. Since understanding basic instrument shape and design is essential for keeping a sharp cutting edge, let's review that information first.
The basics
There are two basic instrument shapes to consider when sharpening:
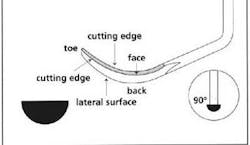
1. The universal curette is half-moon in cross-section
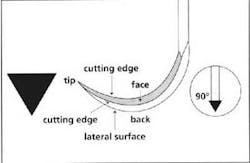
2. The sickle scaler is triangular in cross-section
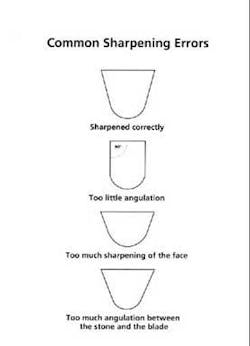
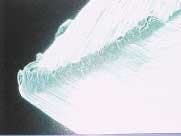
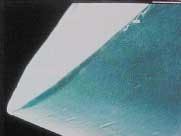
An instrument is deemed dull when the cutting edge becomes rounded from use. The instrument does not "grab" or "bite," thus making deposit removal inefficient. More pressure is needed for effective instrumentation, and the procedure takes longer than usual. (Figure 3)
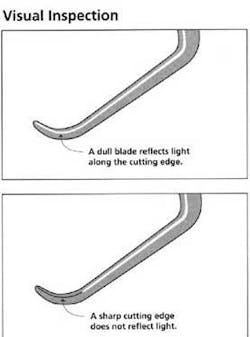
Visual inspection
One way to determine if the instrument is sharp is to use a plastic test stick or a plastic saliva ejector. Apply the cutting edge to the stick and evaluate the "bite" as the edge takes hold. If there is not a "bite" into the plastic, the instrument needs sharpening.
Another way to test sharpness is by visual inspection. For this method, you will need a bright light and magnification. Hold the instrument under the light and rotate it until the edge is facing the light. If you can see light reflecting off the cutting edge, the instrument is dull.
The most popular method of sharpening taught in hygiene schools across the country is the "Stationary Instrument, Moving Stone" technique. Here are the steps, courtesy of Hu-Friedy:
1. Stabilize the instrument.
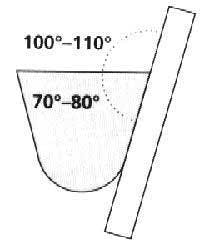
2. Apply the stone to the lateral cutting edge to form a 110º angle.
3. Position the stone to contact the heel of the blade and work toward the tip, rotating the stone toward the tip/toe.
4. Move the stone up and down with short strokes.
5. A sludge will appear on the face of the blade as it is sharpened. It can be wiped clean with a gauze or cloth.
6. Finish with a downstroke to avoid a roughened edge.
7. Repeat the procedure to sharpen the opposite cutting edge (sickles and universal curettes).
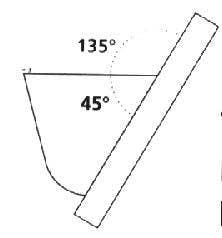
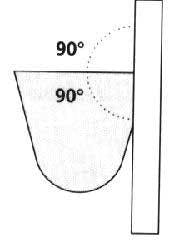
• Correct angulation — When the stone is correctly placed against the blade, the internal angle of 70º to 80º is maintained. )
• Too much angulation — When the internal angle is less than 70º, the blade becomes weak and dulls quickly.
• Not enough angulation — When the internal angle is greater than 80º, the blade becomes bulky and is difficult to adapt to the tooth.
Machine sharpening
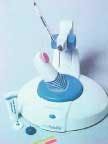
Another innovation in instrument sharpening is a sharpening machine called the PerioStar® 3000. Manufactured by KerrHawe, the PerioStar 3000 is a countertop-designed unit with a clamping device to secure the instrument. The sharpening head is moved into contact with the instrument and rotates around the instrument tip, while maintaining a standard angle of 78º.
The PERIOSTAR machine
A recent clinical study at Loma Linda University conducted by Kristi Wilkins, BS, RDH, compared manual and mechanical sharpening. The study concluded that mechanical sharpening using the PerioStar 3000 preserved more metal and increased instrument life span.
The approximate cost of this sharpening machine is $800 to $900. It can be purchased through any major supplier. This device would be especially useful in offices with multiple hygienists. While the cost may seem high, there is likely to be a significant savings in terms of purchasing new instruments and decreased time spent sharpening manually.
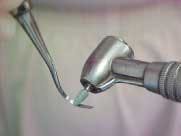
Sharpening witha green stone and handpiece
Several years ago, a hygienist-friend shared a sharpening technique with me that has proven to be quite effective. The technique involves using a high-speed handpiece and a green stone.
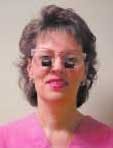
Dianne with DFV loupes
To use this technique successfully, the clinician must be able to see where the instrument is dull. Depending on the clinician's visual acuity, magnifying reading glasses can provide better visualization of the cutting edge.
However, my Designs For Vision® 2.5x loupes have proven invaluable in helping me assess the condition of the instrument cutting edge and see exactly what I need to sharpen. DFV loupes make my workday more enjoyable by allowing me to see easily into the oral cavity and eliminating the back and neck strain that is prevalent among hygienists.
The actual technique involves removing the shiny area of the cutting edge. Typically, it will be 1-3 mm at the end of the cutting edge, which is the area most often used in removing deposits. By holding the instrument under a bright light, the shiny dull edge is clearly visible.
Sharpen sickles by placing the thick part of the stone on the face and gently swipe toward the end of the instrument.
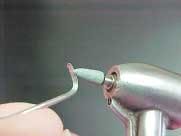
Sharpening curette with a stone
Sharpen curettes by gently running the rotary stone at an 80º angle to the face. Again, using the thick part of the stone works best. Sharpen on the cutting edge. Move the stone toward the tip of the instrument.
When sharpening with a rotary stone, remember that less is better. If the instrument is extremely dull, more swipes with the stone will be needed. In well-maintained instruments, very few strokes are necessary.
The final word
The advantages of having sharp instruments are numerous. They improve patient comfort and make the clinician's job easier. Productivity and efficiency increase because less time is needed for instrumentation. Sharp instruments cut back on fatigue and injury to the hands and wrists, because less pressure and fewer strokes are needed for deposit removal. Make life easier for both you and your patients by keeping your hand instruments razor-sharp!
Dianne D. Glasscoe, RDH, BS, is a professional speaker, writer, and consultant to dental practices across the United States. She is CEO of Professional Dental Management, based in Lexington, N.C. To contact Glasscoe for speaking or consulting, call (336) 472-3515, fax (336) 472-5567, or email [email protected]. Visit her Web site at www.professionaldentalmgmt.com.

