How to uncover and remove stubborn burnished calculus
Key Highlights
- This patient presented with bleeding despite low biofilm levels.
- Diagnosis revealed generalized subgingival burnished calculus.
- Improper ultrasonic or hand-scaling techniques can cause burnishing.
- Sharp instruments and correct angulation are key to prevention.
- Refined instrumentation skills improve outcomes and patient healing.
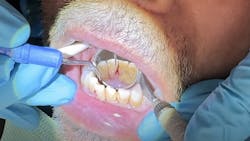
An interesting case came to my operatory the other day. He was a new patient, 30 years old, with no medications or allergies. It had been six months since his last hygiene visit, and his chief complaint was bleeding gingival when brushing.
My first thought was about home care and the possible lack of thereof. Once I started the intraoral assessments (radiographs, perio chart, gingival check, etc.), lack of home care didn’t seem to be the case.
He had a low biofilm index and very little supragingival calculus. But while I was performing periodontal probing, the patient bled … a lot. This definitely didn’t match up to the biofilm levels currently being presented by the patient.
While looking at the radiographs I noticed one thing—one tiny area of smooth calculus on the mesial of no. 28. This set off a little alarm bell in my head, and after checking with the 11/12 explorer, the culprit of the bleeding was generalized subgingival burnished calculus.
What is burnished calculus?
Burnished calculus points to calculus that’s had its outermost layer smoothed over, making it difficult to detect and remove. This smoothing effect can occur during hygiene treatments—whether ultrasonic or hand scaling—when the calculus isn't fully removed, instrumentation is performed incorrectly, and the instrument slips over the surface.
It's a problematic form of calculus because its smooth surface allows harmful bacteria to continue to accumulate and cause inflammation1 and potential periodontal disease, just like this new patient presented with.
How to prevent burnished calculus
When it comes to burnished calculus, know you’re not alone. Working blindly under gingiva with bleeding and a set time (which is sometimes too short) is tricky and takes time to develop. If you find burnished calculus, give yourself a bit of grace and know you’ll be able to take it off and that the area will heal.
We can also prevent burnished calculus from happening. First, proper ultrasonic technique is key. Be sure you’re doing your channeling technique to get to the base of the pocket and remove the calculus. Start at the “top” of the deposit and work your way down to the apex to ensure the calculus is being properly removed. If you’re using your ultrasonic or piezo the same way you would use a hand instrument, it might be time to switch up your technique.
Reference
- Checchi L, Montvecchi M, Checchi V, Zappulla F. The relationship between bleeding on probing and subgingival deposits. an endoscopical evaluation. Open Dent J. 2009;3:154-160.
Need a refresher? Watch the videos below
Second, sharp instruments are critical for proper removal. When instruments are dull, they glide over the deposit instead of gripping underneath, potentially removing only the top layer of the deposit and leaving debris behind. Finding the time to sharpen may be difficult during a busy clinical day, but this time spent can definitely save a lot of heartache when it comes to preventing burnished calculus.
Third, proper angulation of your instrument face to the tooth prevents burnished calculus. If your 70-degree angle is off, meaning it’s smaller than 70, you’ll do a similar motion of gliding over the calculus deposit and removing just the top layer. This seems like a very simple step that you learned the first few days of dental hygiene school, but it’s critical for proper calculus removal.
Burnished calculus is common, but not desirable. With proper techniques and instrumentation, hopefully you can prevent burnished calculus from staying with your patients.
Burnished calculus is one of those difficult situations that can throw off your clinical outcomes. The good news is, with proper techniques, you can catch it, remove it, and prevent it from recurring. Every appointment where you perform dental hygiene care is a reminder that your foundational skills make a huge difference in outcomes. The more you refine these habits, the more effective and confident you become providing optimal care.
About the Author

Melia Lewis, MEd, RDH
Melia Lewis, MEd, RDH, is a dedicated clinical dental hygiene professional with a passion for advancing oral health education and patient care. Currently, she practices at Aspen Heights Dental in Highland, Utah, and is an adjunct professor at Colorado Northwestern Community College. She is cofounder of Hygiene Edge, an online education platform full of helpful tips and tricks to make dental professionals’ lives a little bit easier, and owns and operates Acuti Sharpening, a dental hygiene instrument sharpening company.
Beyond her work as a dental hygienist and educator, Melia is committed to advancing the profession. Her innovative approach and dedication have earned her recognition as a leader in the field of dental hygiene. Reach out to her at [email protected] or on Instagram @hygieneedge and @meliardh.